
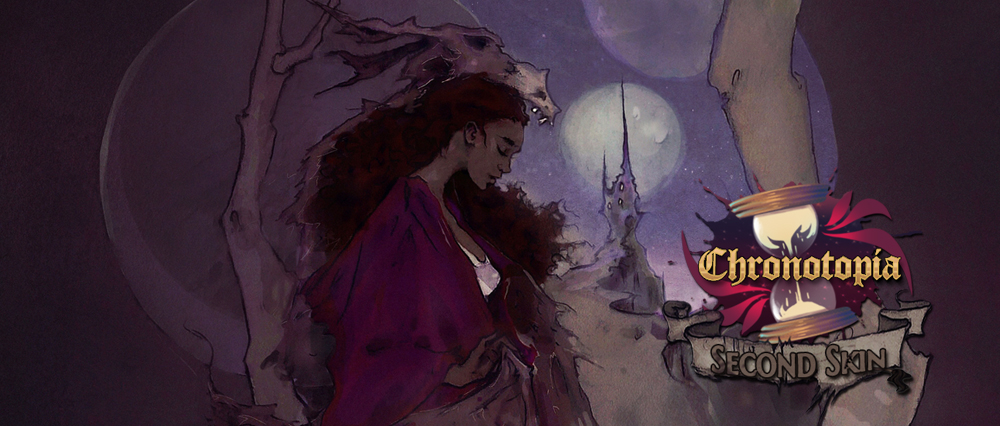
Lately, there’s a talking point that keeps coming back, be it on Twitter or Patreon: background animation. Indeed, that’s something I especially like to do since a few years, as I consider it to be a really interesting tool when it comes to immersing the reader in a particular world. Of course, it’s not adapted to every situation: I think it works pretty well for rich universes (fantasy, for example) but not so much with contemporary settings. But, if well done and accompanied by some music, the result can be quite impressive! (I’m personally very proud of what we managed to do on Chronotopia :3)
Chronotopia Teaser: as you can see, we focus a lot on animations
Insofar as background animation is something few visual novel developers use, they tend to believe it must be incredibly complex. If the complexity depends of course on the animation you have in mind, some are in fact quite easy to make and that’s what I want to prove today! And I want to remind you that I’m self-taught: so if I can pull it off, so can you ;).
For this tutorial, I chose to make a cloud animation because it’s one of the easiest, one that you can put on almost every background, and also one that helps understanding the logic that will be needed for more complex animations. I will only show the method I know but there must be many, many different ways to do the same thing!
Step 1: Exportation
Before getting to the heart of the matter, let’s do some theory first. The method I will be showing is mainly based on transparency: instead of displaying a picture in its entirety, we’ll export it in several elements, all with a transparent background, then recreate it with code. In a way, making background animation is a bit like a puzzle. And for this to work, the artist in charge must be warned in order to make the task easier. It’s Pyrite’s case, as she sent me this PSD for Chronotopia:
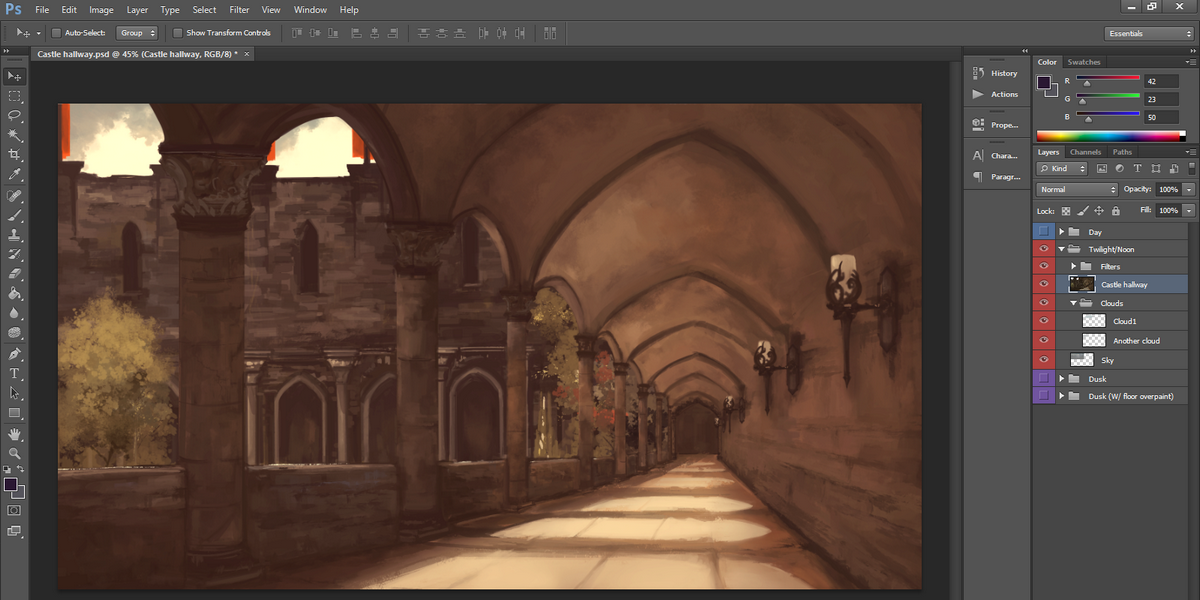 That puzzle here is rather simple. We need a background (which is going to be the sky), two clouds and the main base of the landscape. This division in three layers is absolutely necessary: if the sky and the base are the same, there won’t be any background for the cloud animation anymore and they’ll be all over the picture. Beside, your clouds have to be entirely drawn and exported that way, otherwise they will be cut and it’s going to be ugly.
Here’s what you shouldn’t do to get a pretty animation =’)
If you’re still following the logic up to this point, we’re good. You only need to use an image editing software and hide all the layers except the one you chose and export them one after the other in PNG format. Once you’ve put them in your file, the real work will start.
Step 2: Coding clouds
 In order to get the effect we want, define all the elements in the file of your choice (I tend to put all my animations in the same script to be sure to find them again). We’ll then use the ATL. The Animation and Transformation Language allows you to display a picture while applying transformations on it. Those allowed by RenPy are pretty basic but more than enough to make all sorts of animations. You can influence the transparency of the picture (alpha), the speed of its appearance (pause), its movement (linear) and also make it turn (rotate). For the cloud animation, we will mostly need the linear statement.
The code I’m using is the following:
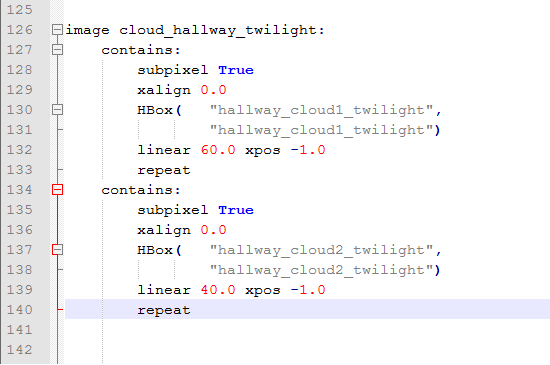 Basically, this block contains two pictures -the two clouds- and the same code is applied to them. This code only tells the cloud to place themselves horizontally on top of the screen and move to the left forever.
Of course, there are subtleties. You may notice that each cloud is in fact displayed twice with the Hbox: it allows the 2nd one to appear on the right even though the 1st one hasn’t left the screen yet. You may also notice that both pictures don’t have the same speed in order to prevent the cloud from always being in the same positions: the fastest cloud will always go past the slowest, which looks a bit more natural. And as you can see with the repeat statement, this animation is a loop.
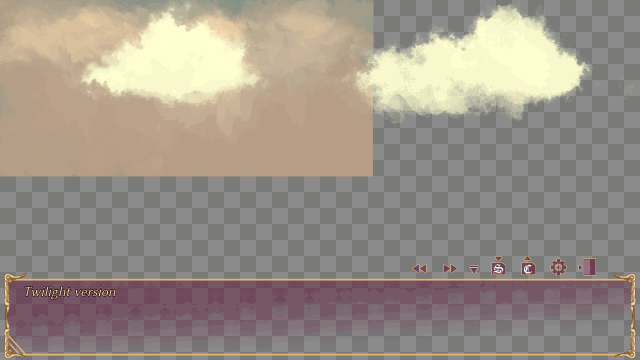
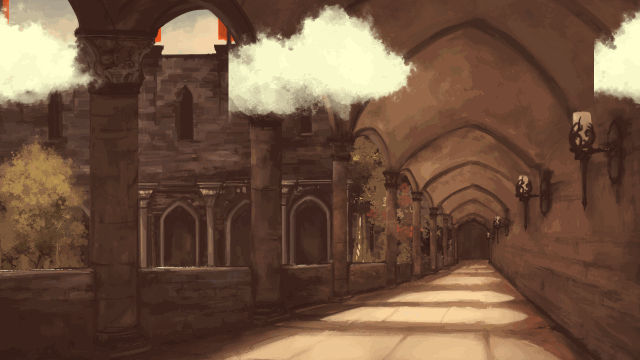
Here’s how the animation looks like without the base
It may seems a bit scary at first but this code fundamentally isn’t all that complicated and you can pretty much only change one parameter, which is the speed of the cloud. Incidentally, that’s the real challenge when it comes to animation: finding just the right number. It should be noted that the bigger the number, the slower it will be. Here I chose 60 and 40 for this background because I’m taking into account the fact that the animation will only be visible in a small area (if it’s tiny, it can be better to increase the speed otherwise you’ll never see the cloud on screen) but you can adjust depending on what you feel is right. The only way to be truly satisfied is to try, try, and try again until you manage to find the right balance.
Step 3: Chain of ATL blocks and the result in-game
Now that we’ve made the animation, we still have to integrate the rest of the landscape. If it’s a very simple one (a base + only one thing moving on top of it), you will probably need only one ATL block. But the more animations you’ll have, the more strategic you’ll have to be. Like this, it’s possible to have a detailed ATL block per animation, then gathering them all in another ATL block to recreate the landscape and not display all the elements line by line in-game.
For the hallway, I could have put everything in the same block but since I have another animation in the night version, I rather split up each one the same way:
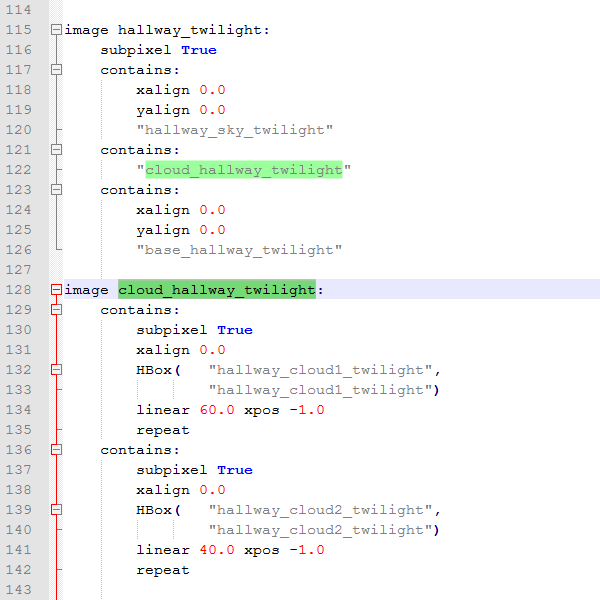
The 2nd block (above) calls in the 1st one so do check the name you gave to them!
This block is simple: it only display the different layers one after the other and put them in the right place. It obviously starts with the sky, as it’s the background, then the cloud animation we’ve just made, and finally the base that’s going to cover most of the screen. Thanks to the transparency of each layer, the result will be convincing enough.
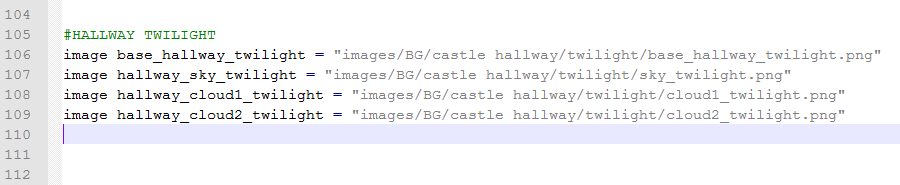
Now that it’s done, we only have to open the script containing the story and declare the background in a line, since it’s a simple one:
 There you go, a beautiful animated background!
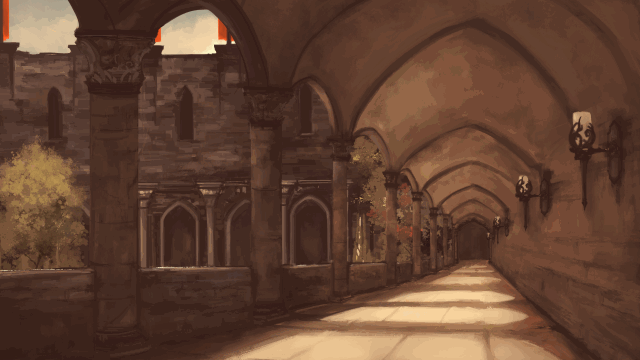
The final result
Some remarks to conclude:
- You may notice that my sky background is hardly bigger than the corresponding hole in my base. It’s not a problem for this particular animation but if you want to do a complex one (like a ship swaying on the sea), you will need to draw almost all of it for the effect to work.
- If this tutorial already seemed very complicated, be aware there’s still the lazy option of using the same sky background and/or cloud animation for every background in your game (if you make different versions for day and night as well) XD. It’s more or less what I did with Milk ~ La légende des étoiles at the beginning and, honestly, it’s not that shocking. There’s no shame in learning at your own pace ;).
And that was my little tutorial about background animations. I don’t think I’ll do one for every effect possible because it would be too easy (the rest is up to you after all) but if there are request, I could always write another one. I hope my article was helpful ^_^.
You can use this code as is in your own visual novel project if you want, I only ask that you mention me in the credits and drop me a line so that I could admire your hard work (if it’s available somewhere): it’s not much but it would really make me happy!